
>

How to Choose a Bath Waste Push Button for Your Project

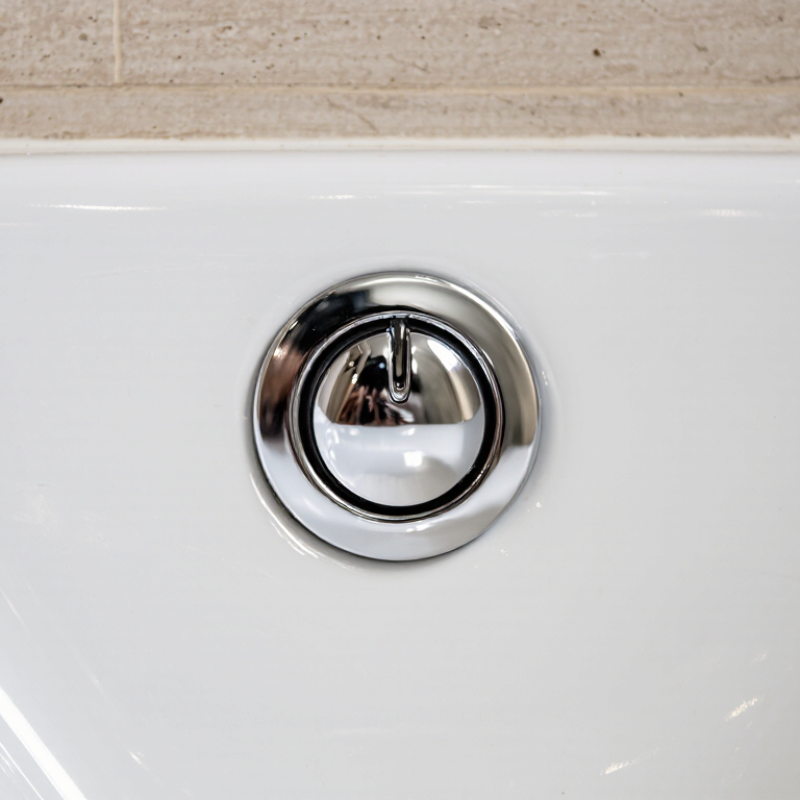
A Bath Waste Push Button looks small, yet it affects daily comfort, cleaning, and future maintenance. The right choice depends on more than finish. Check the waste type, basin compatibility, overflow arrangement, and access to the mechanism. A bright chrome button may suit a crisp white basin; a brushed finish can soften a warmer palette. Small details matter.

Industry reports help set the wider context. The NKBA’s 2024 Kitchen & Bath Design Trends Report and Houzz’s 2024 U.S. Bathroom Trends Study examine bathroom design and renovation priorities. They provide useful background, but they do not establish a universal performance ranking for push-button wastes. That distinction matters. A trend report is not a product test, and a polished product photo cannot confirm fit or serviceability.

I have not been given a verifiable source for a named Bath Waste Push Button specialist’s direct quotation. Inventing one would weaken a practical guide. Instead, use a simple specification rule: confirm dimensions, materials, finish, overflow compatibility, and replacement-part availability before ordering. Then check the manufacturer’s installation details. Easy to overlook. Even a careful selection can miss a site-specific constraint, so verify the actual basin and plumbing before final approval.
How to Choose a Bath Waste Push Button for Your Project

Define the Bath Waste Type and Confirm the 1½-Inch Outlet Size

01
When selecting a bath waste push button, identify the waste mechanism before comparing finishes. A push-button waste may use a click-clack plug, while other baths use a cable or linkage-operated system. They are not automatically interchangeable. Check the existing waste, overflow arrangement, and tub design. A close-up photo helps, but measurements matter.

02
Next, confirm the outlet connection is 1½ inches (about 40 mm) where specified. This is a common nominal size, not a guarantee that every thread, gasket, or tailpiece will match. Measure carefully. Inspect how the outlet joins the trap. If replacing an old fitting, note its actual diameter and connection style; worn parts can distort a quick measurement. Also check the bath’s overflow opening and the distance between the waste and overflow. Small differences matter. I have seen a fitting look right on the shelf, then sit proud against the tub. That is an avoidable surprise, though product drawings do not always show every detail.

Tips: Compare the supplier’s dimensional drawing with your measurements. Confirm whether 1½ inches refers to the outlet or trap connection. Keep the old gasket as a reference, but replace it if hardened or cracked.

Match the Push-Button Mechanism to the Waste and Overflow Layout

A bath waste push button must suit the way the waste and overflow are connected. In many layouts, the button sits on the overflow plate and moves a cable that opens or closes the plug. Other assemblies use a different linkage, so a button that looks right may not operate the existing waste.

Check the bath’s drawing or inspect the fitting before ordering. Note where the button sits, how the cable runs, and whether the waste body has a compatible connection. Cable length matters, especially when the overflow and drain are far apart. Tight bends can make the button stiff or unreliable. Small detail. Big difference.

Also check the waste opening and the space beneath the bath. A shallow bath or restricted access can affect which assembly fits and how easily it can be serviced. Measure twice, if possible. This is an easy detail to miss when selecting from a photograph. If replacing only the button or overflow plate, confirm that its mechanism matches the installed waste; similar-looking parts are not always interchangeable. Keep a clear route to the cable and test the plug through several cycles before sealing access panels. A little resistance during testing deserves a second look.

Check Thread, Seal, and 40 mm Pipe Compatibility Before Selection

How to Choose a Bath Waste Push Button for Your Project

Before choosing a push-button bath waste, check the thread on the waste body and the button assembly. Diameter alone may not confirm a match; thread pitch and profile matter too. Compare the product drawing with the part already fitted, or take the old component to a plumbing supplier. A mismatch can leave the button loose or prevent it from engaging properly. Small details matter.

Check how the seal sits against the bath and waste body. A flat gasket needs a clean, even surface, while some designs use a shaped seal. Look for cracks, distortion, or a seal that shifts when lightly pressed. Hand-tightening is usually safer than forcing plastic threads with a tool. If the parts do not align, stop and recheck them rather than tightening harder.

Confirm that the outlet connects to your 40 mm pipework. “40 mm” can describe a nominal size, so the actual fitting style and connection dimensions still need verification. Check the manufacturer’s measurements, including any adaptor or trap requirements, and measure the existing pipe where accessible. Measure twice. I would also check clearance beneath the bath: a compatible thread and pipe can still be awkward if the button mechanism meets the frame or plumbing. A quick dry fit may reveal that problem before the seal is compressed.

How to Choose a Bath Waste Push Button for Your Project - Check Thread, Seal, and 40 mm Pipe Compatibility Before Selection
Compatibility Check Common Specification How to Verify Selection Guidance
Waste-body thread Many bath wastes use a 1½-inch BSP parallel connection (G 1½), with a nominal outside thread diameter of about 47.8 mm and 11 threads per inch. Check the waste-body drawing or measure the male thread. Confirm the thread standard and pitch; nominal size alone is not enough to establish compatibility. Choose a push-button assembly specified for the existing waste body. Do not force mismatched threads together.
Outlet pipe A 40 mm waste connection commonly refers to pipe with a nominal outside diameter of 40 mm in systems using that sizing convention. Connector dimensions and standards can vary by region and material. Measure the pipe outside diameter and identify whether it is intended for solvent welding, a compression fitting, or another connection type. Match both the pipe size and connection method. A 40 mm pipe connection is not the same as a 1½-inch threaded connection.
Bath-to-waste seal Bath wastes commonly seal against the bath using a washer or gasket. Seal shape, thickness, and material depend on the waste design and bath surface. Compare the replacement gasket with the original and inspect the waste flange, bath opening, and underside seating surface for damage or unevenness. Use the gasket intended for the specific waste assembly. A sealant should not be treated as a substitute for a correctly sized gasket.
Push-button mechanism Push-button bath wastes may use a click-clack mechanism or a button-operated linkage. Their internal parts and replacement button fittings are not necessarily interchangeable. Identify the mechanism type and check the button attachment, travel, and operating parts against the assembly specification. Confirm compatibility with the complete waste mechanism, not just the visible button diameter or finish.
Overflow connection Some bath waste assemblies include an overflow pipe and a control that operates the drain stopper; other push-button designs operate directly at the waste. Check whether the existing bath has an overflow opening and note the location and type of its connection to the waste assembly. Select an assembly that matches the bath’s overflow arrangement and operating method.
Bath opening and flange Opening sizes and flange dimensions are not universal across all bath waste designs. Measure the bath opening and compare it with the manufacturer’s stated fitting range and flange dimensions for the proposed assembly. Check that the flange covers the opening and that the threaded body has sufficient length for the bath and washer stack.
Under-bath clearance The waste body, trap, and pipework need enough space below the bath for assembly, operation, and future access. Measure the available vertical and horizontal space, including the position of joists, panels, and nearby pipework. Confirm that the button mechanism and outlet route can be installed without stress, obstruction, or restricted access.

Compare Brass and Stainless-Steel Options for Corrosion Resistance

A bath-waste push button faces repeated splashes, cleaning products, and damp air beneath the tub. Brass is widely used for plumbing components because it is workable and can provide dependable service, but performance depends on the alloy and protective finish. If plating is scratched, the exposed surface may tarnish; some brass alloys can also suffer dezincification in aggressive water. Check the alloy specification, not just the word “brass.”

Stainless steel offers a different balance. The Nickel Institute’s technical guidance identifies molybdenum as an important addition in Type 316; typical 316 contains about 2–3% molybdenum, which helps resist chloride-related pitting better than Type 304. That can matter near coastal homes or where cleaners leave residues. Still, stainless is not immune to corrosion, and crevices around a button can hold moisture. Small details matter.

For context, NACE International’s 2016 IMPACT study estimated global corrosion costs at US$2.5 trillion annually, or 3.4% of global GDP. That figure covers many industries, not bath fittings, so it is not a product-life prediction. For a project, compare documented alloy grades, finish durability, and cleaning guidance. Ask how the button and its hidden parts are made. A polished sample can look convincing, but installation conditions may tell a less tidy story.

Verify Installation Clearance, Actuation, and Applicable Plumbing Codes

A bath waste push button should fit the space beneath the tub, not just the visible opening. Check the manufacturer’s installation drawing against the actual drain position and nearby framing. Some mechanisms need room for a cable bend or moving linkage. A tight corner can restrict movement or make future servicing awkward. Measure twice. Include the panel or access hatch in your clearance check.

Actuation should feel steady and predictable. Press the button through its full travel while watching the stopper rise and seat. It should not scrape the drain or require excessive force. If the tub is already installed, test with the waste assembly in its final position; bench testing can miss alignment problems. Feel the travel. A little resistance may be normal, but sticking deserves a closer look.

Check applicable plumbing requirements before choosing the assembly. Rules can differ by location and may address drain sizing, overflow connections, materials, or access for maintenance. Confirm details with the local plumbing authority or a qualified installer, especially during renovations. Keep the installation sheet and note the measured clearance. On a rushed job, I have seen that small step skipped; it can leave a neat-looking button paired with a mechanism that is difficult to reach or adjust.

Newsletter

Keep up on our always evolving product features and technology. Enter your e-mail and subscribe to our newsletter.